

Updated May 13, 2026
Top Scan to Email Printer Setup: Your Ultimate 2025 Guide
Table of Contents
Ever found yourself drowning in paperwork, desperately searching for that one important document?
You’re not alone!
When I first set up my business, papers were scattered everywhere until I discovered scan to email printer setup – a game-changing feature that transformed my entire workflow.
This simple technology lets your printer scan documents and send them directly to email recipients without computer intervention, saving countless hours of manual work.
Did you know the average office worker wastes up to 40% of their day managing paper documents?
In this comprehensive guide, I’ll share everything I’ve learned about scan to email printer setup across all major brands – from basic configuration to advanced troubleshooting and security best practices.
Whether you’re running a small business or managing a home office, this guide will help you master this essential productivity tool!
Scan to Email Basics: What You Need to Know
Scan to email isn’t just some fancy tech term – it’s a genuine game-changer for anyone dealing with physical documents.
At its core, this feature lets your printer scan a document and immediately send it as an email attachment without using your computer as a middleman.
The magic happens because your printer connects directly to an email server using SMTP (Simple Mail Transfer Protocol).
Think of it like your printer having its own email account!
Once properly configured, you can walk up to your printer, place a document in the feeder, select email, choose recipients, and hit send – all from the control panel.
Requirements for Setting Up Scan to Email
Before diving into setup, make sure you have:
- A compatible printer with network connectivity (WiFi or Ethernet)
- Your printer connected to the same network as your devices
- Email account information including server details
- Possible security adjustments for your email provider
- A good dose of patience (trust me on this one!)
One thing that caught me off guard was email size limits.
The first time I scanned a 50-page color document at high resolution, the email bounced back instantly.
Now I adjust scan quality based on what I’m sending – lower resolution for everyday documents, higher for important contracts.
Printer-Specific Setup Guides: Brand by Brand
Different printer brands have their own unique approaches to scan to email setup. Let’s break down the process for each major manufacturer.
HP Printer Setup: Making Friends with Your LaserJet
HP printers offer some of the most robust scan to email capabilities on the market, but the setup process can be intimidating if you don’t know the secret pathway.
For most HP LaserJet models, you’ll need to access the Embedded Web Server (EWS) rather than using the control panel for initial setup:
- Find your printer’s IP address (usually under “Network Settings” on the printer’s display)
- Type that IP address into your web browser
- Look for “Scan/Digital Send” or “Scan to Email” in the navigation tabs
- Enter your outgoing mail server information
The most common mistake?
Not realizing you need to configure both the “Outgoing Email Profiles” AND “Email Address Book” sections.
The first tells the printer how to send emails, while the second tells it where to send them.
HP ePrint gives your printer its own email address for receiving print jobs from anywhere.
Use the HP Smart app to manage an approved sender list, or you might find yourself with unexpected print jobs!
Canon Printer Setup: Mastering imageRUNNER and PIXMA Models
Canon’s approach varies significantly between their consumer and business lines:
For Canon PIXMA Home/Small Office Printers:
- Access the printer’s menu and select “Network Settings”
- Choose “Email Setup” or “Scan to Email”
- Enter your email service provider information
- Most PIXMA models require the Canon IJ Scan Utility to be installed on your computer
Canon’s consumer printers typically use a “scan-to-computer-then-email” workflow rather than direct SMTP connection. This means your computer needs to be on for the scan to email function to work.
For Canon imageRUNNER Business Printers:
- Access the printer’s web interface by typing its IP address in a browser
- Navigate to “Function Settings” > “Send” > “Email Settings”
- Configure the SMTP server settings
- Set up the address book for frequent recipients
Brother Printer Setup: Simple but Powerful
Brother printers have some of the most straightforward scan to email setups:
- Access the web interface by entering your printer’s IP address in a browser
- Navigate to “Scan” or “Scan to Email” settings
- Enter your SMTP server details
- Configure your address book
Their printers also excel at supporting various email security protocols without requiring constant firmware updates.
Most Brother MFC models allow you to scan to email directly from the control panel once configured, making it one of the most user-friendly experiences across all brands.
Epson Printer Setup: WorkForce Solutions
Epson’s WorkForce line offers solid scan to email capabilities:
- Access the printer’s web config utility by typing its IP address in a browser
- Navigate to “Network” > “Email Server”
- Enter your SMTP server information
- Configure the recipient list
Epson’s Document Capture Pro software adds additional functionality for document management before sending scans.
While some models support direct scan to email, many Epson printers require this software to be running on a connected computer.
A unique feature of Epson WorkForce business printers is their ability to scan to multiple destinations simultaneously – sending the same document to email, network folder, and cloud storage in one operation.
Xerox Printer Setup: Enterprise-Grade Solutions
Xerox offers comprehensive scan to email features, especially in their VersaLink and AltaLink series:
- Access the Embedded Web Server by typing the printer’s IP address in a browser
- Navigate to “Apps” > “Email” or “Scan to Email”
- Configure the SMTP settings
- Set up the address book and default settings
Xerox’s SMTP configuration is particularly robust, supporting advanced authentication methods and security protocols.
Their printers also excel at handling complex workflows like conditional scanning based on document content.
Lexmark Printer Setup: Business Solutions Made Simple
Lexmark’s approach to scan to email is straightforward and business-focused:
- Access the Embedded Web Server by typing the printer’s IP address in a browser
- Navigate to “Settings” > “E-mail” > “E-mail Setup”
- Configure the SMTP server settings
- Set up the address book entries
Lexmark’s security features for scan to email are particularly strong, including options for S/MIME encryption and digital signatures.
Their enterprise models also support LDAP integration for pulling email addresses directly from your organization’s directory.
Troubleshooting Common Scan to Email Issues Across All Brands

Even perfect setups sometimes fail.
After nearly tossing my printer out the window during a critical audit week, I’ve developed a systematic approach to troubleshooting scan to email problems that works for all printer brands.
Why Your Printer Isn’t Scanning to Email
Scan to email failures usually come down to one of four culprits:
- Email server connection issues – Your printer can’t talk to the email server
- Authentication problems – Your username/password isn’t being accepted
- Network connectivity – Your printer’s WiFi or ethernet connection is unstable
- Outdated firmware – Your printer’s internal software needs an update
The tricky part? Error messages rarely identify the actual problem. “Communication Error” could mean almost anything!
Diagnosing Connection Problems
Start by checking if your printer can access the internet:
- Print a network configuration page
- Verify the printer has a valid IP address
- Make sure gateway and DNS server information is correct
- Try printing a test page to confirm internet connectivity
If internet access works but email doesn’t, the issue likely involves email settings. Different providers have different requirements, especially regarding security.
Brand-Specific Troubleshooting Tips
- HP Printers: Check the “Scan/Digital Send” log in the EWS for detailed error messages. HP printers often reject connections if the SSL/TLS certificate doesn’t match exactly.
- Canon Printers: Business models have a detailed “Communication Log” in their Remote UI. For PIXMA models, reinstalling the IJ Scan Utility often resolves persistent issues.
- Brother Printers: The “SMTP/POP3 Status” page in the web interface provides detailed connection information. Brother printers are particularly sensitive to DNS issues.
- Epson Printers: Check the “Network Status” page for connection errors. Epson WorkForce models often require specific port configurations based on your email provider.
- Xerox Printers: Use the “Test Email” function in the Embedded Web Server to diagnose specific SMTP issues. The detailed logs can identify exactly where the connection is failing.
- Lexmark Printers: The “E-mail Server Settings Test” in the web interface provides comprehensive feedback on connection issues. Lexmark printers are particularly strict about SSL certificate validation.
Understanding and Resolving SMTP Errors
SMTP errors can be baffling if you don’t know how to interpret them. These cryptic messages follow a pattern:
- 5XX errors – Permanent failures (something is fundamentally wrong)
- 4XX errors – Temporary failures (might work if you try again later)
- 2XX messages – Success indicators (everything worked!)
Common SMTP Error Messages Explained
- 535 Authentication Failed: Your username/password is incorrect
- 550 Mailbox Unavailable: The recipient address doesn’t exist or is rejecting mail
- 501 Syntax Error: Something is formatted incorrectly
- 554 Transaction Failed: Your message was rejected as spam
Fixing SMTP Connection Failures
The dreaded “Cannot connect to SMTP server” message usually stems from network/firewall issues or SSL/TLS certificate problems.
Office networks often have firewalls that block SMTP ports. Solutions include:
- Asking IT to whitelist ports 25, 465, and 587 for the printer
- Configuring the printer to use port 587 with TLS encryption
- Setting up an internal SMTP relay server
For home offices, your Internet Service Provider might block port 25 to prevent spam.
Comcast users often encounter this – the workaround is using your email provider’s servers on port 587.
A great troubleshooting tool is MXToolbox’s SMTP Test, which can check if your SMTP server is accessible and if your credentials work, helping pinpoint whether the problem is with your printer or the email server.
Email Provider-Specific Settings
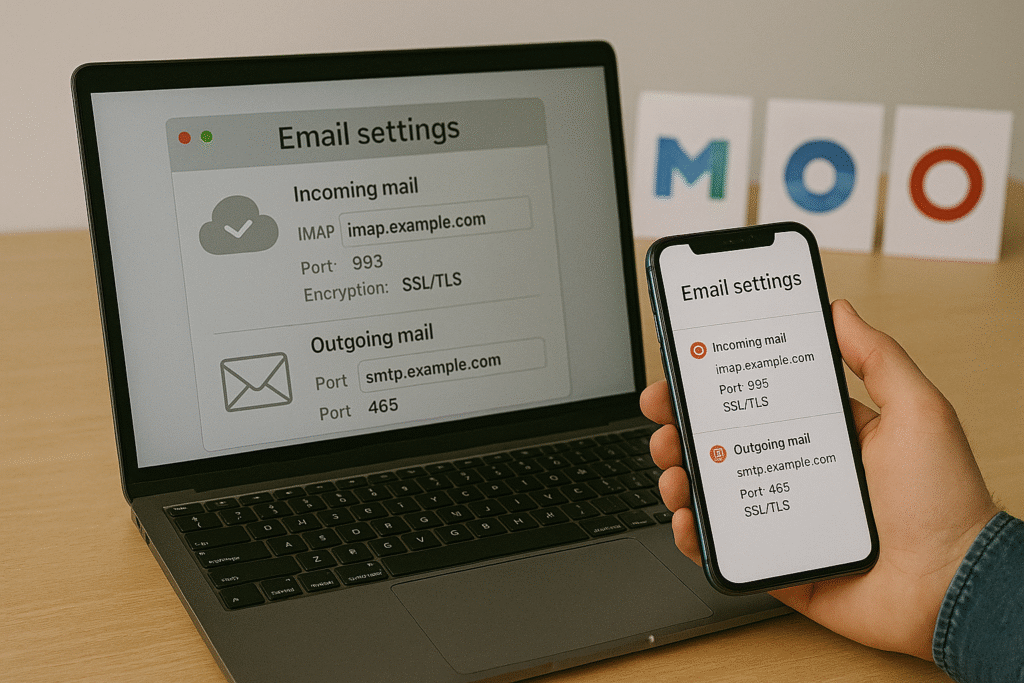
Different email providers require different configurations. Here are the optimal settings for popular services:
Gmail Settings
For Gmail accounts, you’ll need:
- SMTP Server: smtp.gmail.com
- Port: 587
- Encryption: TLS
- Authentication: Required
- Username: Your full Gmail address
- Password: An App Password (if you use 2-factor authentication)
Google’s security features often block printers from connecting.
You’ll need to create an App Password if you have 2-factor authentication enabled.
Microsoft 365/Outlook.com Settings
For Microsoft 365 accounts:
- SMTP Server: smtp.office365.com
- Port: 587
- Encryption: STARTTLS
- Authentication: Required
- Username: Your full email address
- Password: Your Office 365 password or App Password
The trick with Office 365 is making sure you’re using STARTTLS encryption specifically (not SSL).
Microsoft’s Office 365 SMTP settings are very specific and must be followed exactly.
Yahoo Mail Settings
Yahoo requires:
- SMTP Server: smtp.mail.yahoo.com
- Port: 587
- Encryption: TLS
- Authentication: Required
- Username: Your full Yahoo email address
- Password: An App Password (regular password won’t work)
Yahoo now requires App Passwords for all third-party apps, but their error messages don’t make this clear at all.
You can create Yahoo App Passwords in your account security settings.
Other Email Providers
- AOL: smtp.aol.com, Port 587, TLS encryption
- Zoho Mail: smtp.zoho.com, Port 587, TLS encryption
- ProtonMail: mail.protonmail.ch, Port 587, TLS encryption (requires bridge app)
- GoDaddy Email: smtpout.secureserver.net, Port 587, TLS encryption
Email Delivery Issues and Security: Protecting Your Data
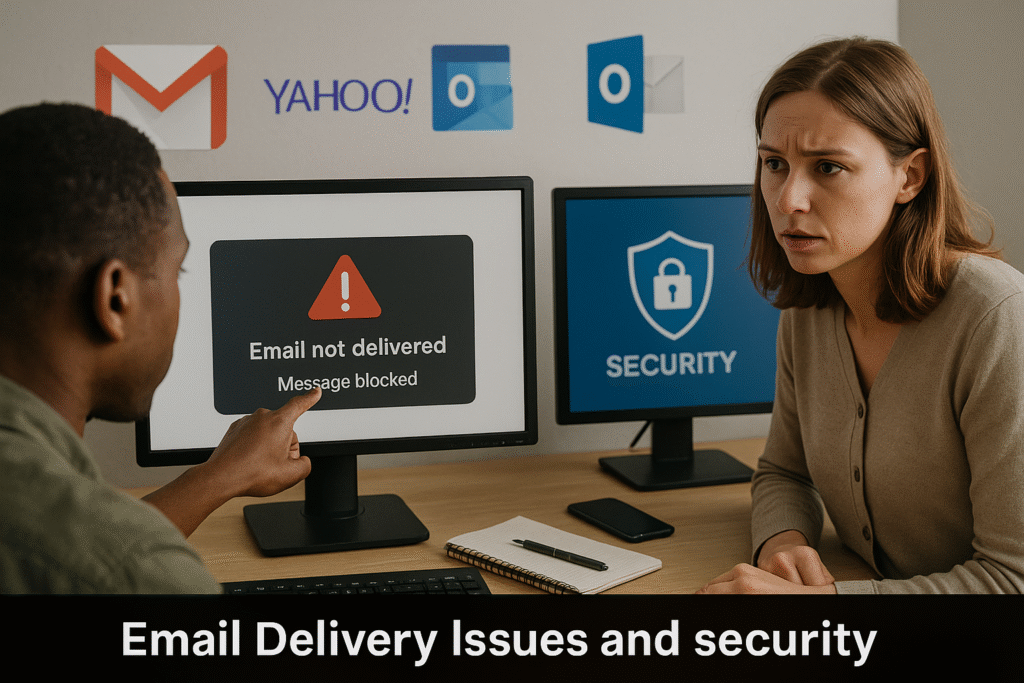
Email security wasn’t top of mind when I first set up scan to email.
My priority was just making it work!
But after reading about data breaches involving intercepted documents, I realized how vulnerable our sensitive information could be.
Dealing with Email Rejection Issues (Error 550)
A 550 error typically means “I know who you’re trying to reach, but I won’t deliver your message.” This can happen for various reasons:
- Invalid recipient address
- Mailbox full
- Policy restrictions
- Domain rejection
The fix depends entirely on the specific rejection reason. Check the full error message – it often tells you exactly why the message was rejected.
Checking if Your Email Server Is Blacklisted
Email blacklists are the “do not call” lists of the email world.
If your server’s IP address lands on one, many receiving servers will reject all your messages without telling you.
To check if you’re blacklisted, use these tools:
- MXToolbox Blacklist Check – Enter your email domain or server IP
- MultiRBL – Checks against multiple blacklists simultaneously
- EmailStuff.org Blacklist Checker – Simple blacklist check
Most blacklistings happen because of spam complaints or security breaches.
Prevention is much easier than removal, which can take weeks and significantly impact your business communications.
Best Practices for Secure Scan to Email Configuration
Implementing secure scanning practices protects confidential information and maintains client trust:
Use Encryption Whenever Possible
- Enable TLS/SSL for all email connections
- Use secure PDF format with passwords for sensitive documents
- Enable S/MIME if your email system supports it
Implement User Authentication
- Require user login at the printer before scanning
- Enable scan logs to track who scanned what and when
- Use role-based access to limit who can scan to which destinations
Regular Maintenance and Updates
- Update firmware at least quarterly
- Rotate passwords every 90 days
- Review authorized email recipients periodically
Firmware updates are particularly important for security.
Printer manufacturers regularly release patches that fix vulnerabilities – without them, your scanned documents could be intercepted without your knowledge.
Advanced Features Across Brands
Modern multifunction printers offer sophisticated scan to email features beyond basic functionality:
OCR (Optical Character Recognition)
Most business-class printers from HP, Canon, Xerox, and Ricoh now include OCR capability, allowing you to create searchable PDFs.
This feature makes scanned documents fully searchable both in email and when stored.
The OCR accuracy varies by brand, with Xerox and Canon typically offering the highest accuracy rates for complex documents.
Document Format Options
Different brands excel at different document formats:
- HP: Strong PDF/A support for archival-quality documents
- Canon: Excellent compressed PDF options that maintain quality while reducing file size
- Xerox: Superior Office document format integration (Word, Excel)
- Ricoh: Exceptional encrypted PDF options for highly sensitive documents
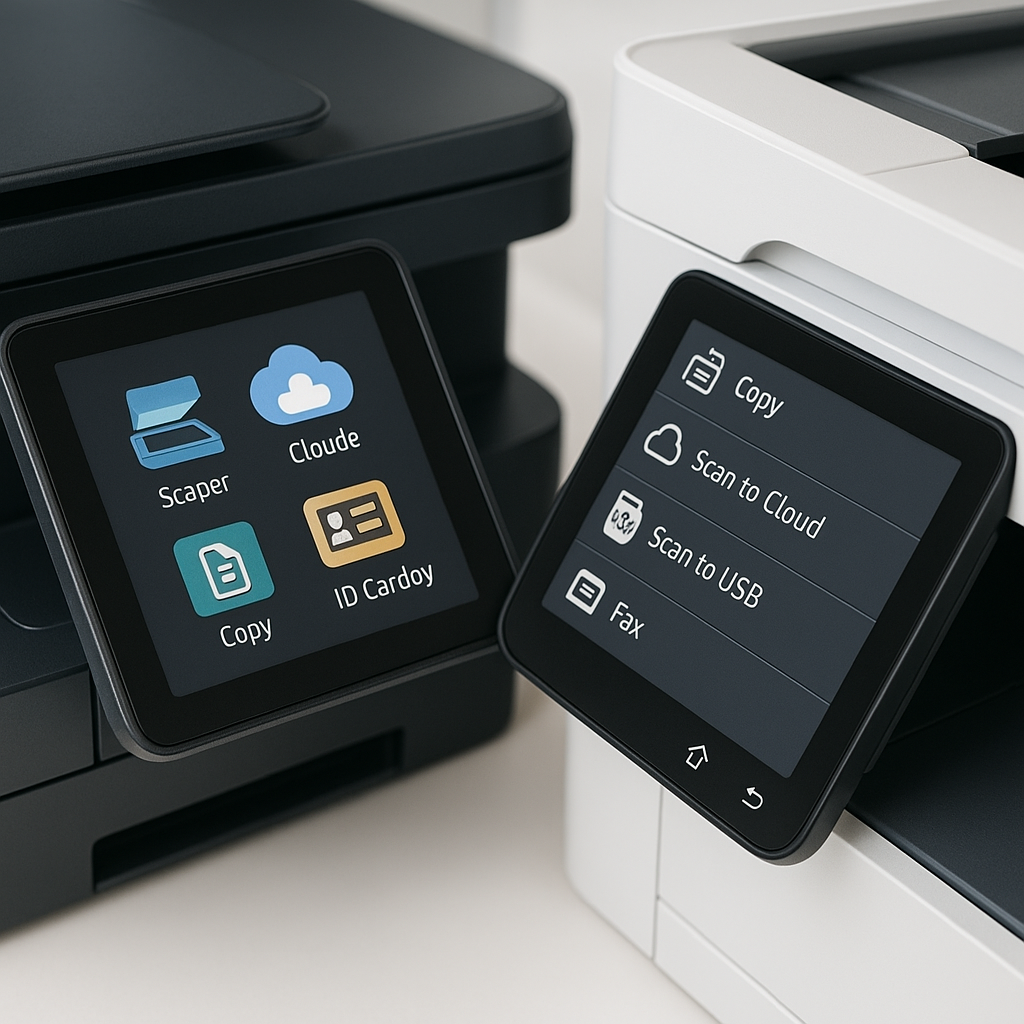
Cloud Integration
Newer printer models offer direct integration with cloud services alongside email:
- HP: Seamless integration with Box, Dropbox, Google Drive
- Canon: Direct scanning to Microsoft OneDrive and SharePoint
- Brother: Strong Google Workspace integration
- Epson: Excellent Evernote and Dropbox support
Mobile Scanning Apps
Major printer manufacturers now offer companion apps that enhance scan to email functionality:
- HP Smart App: Comprehensive management of scan to email profiles
- Canon PRINT Business: Advanced document processing before sending
- Brother iPrint&Scan: Simple but effective mobile scanning and sending
- Epson iPrint: Strong mobile device integration
Conclusion: From Paper Chaos to Digital Efficiency
Setting up scan to email functionality has literally saved me hours each week. No more scanning to my computer, finding the file, attaching it to an email, and sending it.
Now it’s a one-step process that takes seconds rather than minutes. When you’re juggling dozens of documents daily, those minutes add up fast!
The journey to mastering scan to email may test your patience, but the productivity gains are worth every frustrating moment.
Start with the basics, work through the inevitable hiccups, and before long, you’ll wonder how you ever managed without this functionality.
Remember, prevention is always better than troubleshooting.
Take the time to secure your setup properly, keep your firmware updated, and perform regular maintenance checks.
Your future self will thank you when you’re not frantically googling error codes five minutes before an important deadline!
No matter what printer brand you have – from HP to Canon, Brother to Epson, or Xerox to Lexmark – you now have all the information you need to set up, troubleshoot, and optimize your scan to email workflow.
Say goodbye to paper chaos and hello to digital efficiency!
Ready to transform your document workflow? Your printer is waiting to become the productivity powerhouse you never knew you needed!

Recent Posts
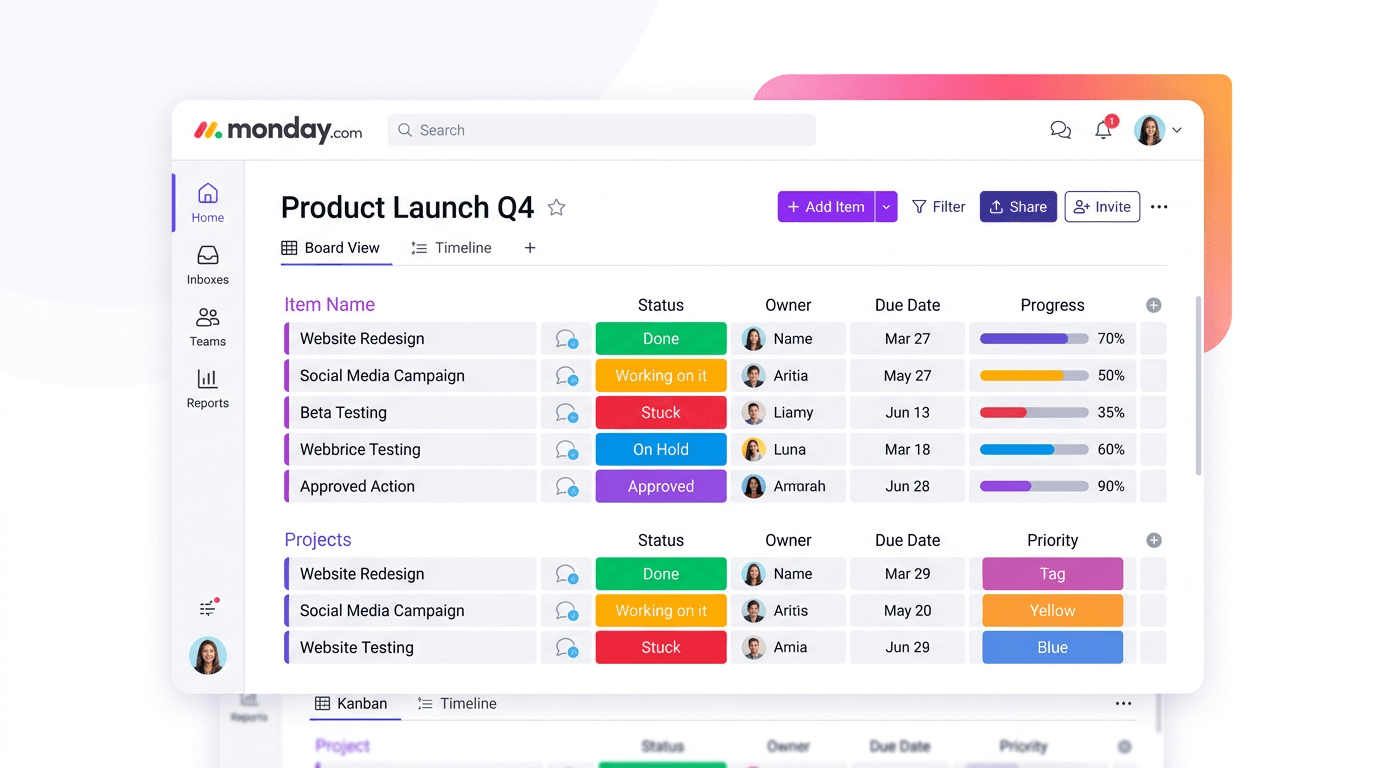
Monday.com Review 2026: Is It Still the Best Work OS?
I tested Monday.com against ClickUp, Asana, and Wr...
Updated May 30, 2026

AI Writing Software for Blogging in 2026: Best Tools + How to Stay AI-Search Vis...
The best AI writing software for blogging in 2026 ...
Updated May 30, 2026
HubSpot Review 2026: Is It Worth the Cost?
I tested HubSpot’s free CRM, Starter, and Pr...
Updated May 29, 2026
Teamwork.com Review 2026: Is It the Best PM Tool for Client Work?
I tested Teamwork.com for agency and client projec...
Updated May 29, 2026
Wrike Review 2026: Is It Worth the Cost?
I tested Wrike in real enterprise workflows. Here&...
Updated May 29, 2026
Asana Review 2026: Is It Worth It? (Honest, In-Depth Analysis)
I tested Asana across real team workflows. Here...
Updated May 29, 2026
Newsletter
Don't miss a thing!
Sign up to receive daily news